
PA System Installation & Setup Guide
Step-by-step PA system installation & setup guide from experts. Learn power design, zoning, cabling, testing, and commissioning for reliable sound performance.
Introduction: Why a Proper PA System Setup Matters
Have you ever attended a meeting, factory announcement, or school assembly where half the crowd couldn’t hear clearly? That’s not a speaker problem — it’s a design and installation flaw.
A PA system (Public Address system) isn’t just about connecting microphones to speakers. It’s a carefully planned network of amplifiers, zones, cabling, and acoustics that ensures every message is loud and clear — whether in a classroom, office, warehouse, or outdoor yard.
In this guide, you’ll learn everything an expert considers when installing a PA systems — from wattage calculations and cabling to zoning, commissioning, and maintenance — so you can design a system that works perfectly 24/7.
1. Understanding the Role of a PA System
A PA system is designed to amplify and distribute sound evenly to all listeners. It is widely used in:
- Schools and colleges for announcements
- Factories and industrial plants for safety alerts
- Hospitals, malls, and offices for paging and background music
- Large campuses or transport terminals for public announcements
A well-installed PA system ensures:
✅ Clear communication
✅ Reliable operation
✅ Even sound coverage
✅ Scalability for future upgrades
2. PA System Components — The Building Blocks
Before diving into installation, understand each component and its purpose.
| Component | Function |
|---|---|
| Microphone | Captures voice (wired, wireless, paging mic, or desktop gooseneck) |
| Mixer/Pre-Amplifier | Mixes multiple input sources like mic, music player, or alerts |
| Power Amplifier | Boosts signal strength to drive speakers |
| Speakers | Converts electrical signal into audible sound (wall, ceiling, horn, column types) |
| Cables | Carry audio and power signals |
| Zone Selector or Matrix Controller | Directs audio to specific areas |
| Emergency Mic / Alarm Input | Allows priority override for emergency announcements |
| Power Supply / UPS | Ensures stable operation even during power loss |
3. Power and Wattage — Getting It Right
RMS vs Peak Power
- RMS Power = Continuous safe power a speaker can handle.
- Peak Power = Short burst tolerance (used during loud moments).
Always design based on RMS Power. For reliability, the amplifier power should be 1.5 to 2 times the total speaker RMS load.
Example Calculation
If each ceiling speaker = 10W RMS
and there are 10 speakers in a zone →
Total load = 10 × 10W = 100W
Add 25% headroom → Amplifier = 125W minimum
This ensures clear output without distortion or overheating.
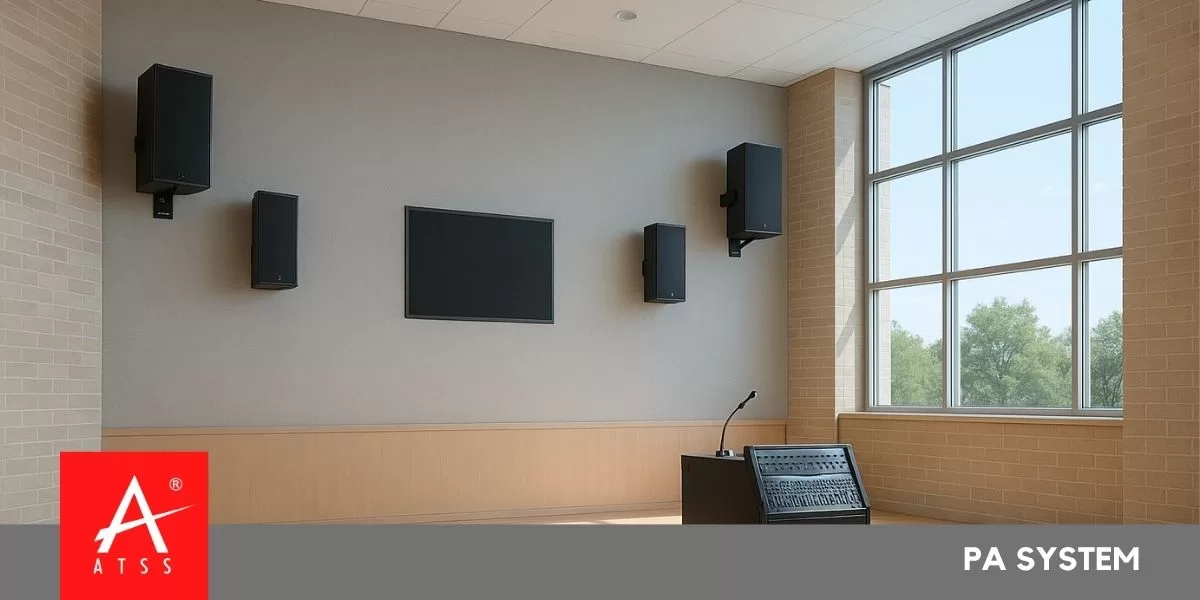
4. Selecting the Right Speakers
Each area requires a specific type of speaker:
| Area Type | Recommended Speaker | Wattage Range |
|---|---|---|
| Office / Classroom | Ceiling Speaker | 6–15W |
| Corridors / Lobbies | Wall Mount Speaker | 15–20W |
| Factory Floor / Outdoor | Horn Speaker | 30–60W |
| Auditorium / Hall | Column or Line Array Speaker | 60–120W |
💡 Tip: Always check speaker sensitivity (dB/W/m). A 90–95 dB sensitivity speaker produces more sound with less power — perfect for energy efficiency.
5. Designing PA System Zones
Zoning allows you to control different areas independently — vital for buildings with multiple floors or diverse environments.
Benefits of Zoning:
- Adjust volume separately for quiet offices vs. noisy workshops.
- Broadcast announcements only to specific areas.
- Reduce system load by isolating inactive zones.
Common Zone Examples
- Zone 1 – Reception & Office
- Zone 2 – Classroom Blocks
- Zone 3 – Factory or Workshop
- Zone 4 – Outdoor Area
Each zone can have separate amplifiers, speakers, and volume controls.
6. Acoustic Design and Speaker Placement
Before installing speakers, study the room’s acoustic profile:
Factors to Consider:
- Ceiling height
- Wall material (glass, concrete, wood)
- Background noise level
- Reverberation and echo
Speaker Placement Guidelines
- Ceiling Speakers: 6–8 m spacing for even sound coverage.
- Horn Speakers: Aim 30° downward in open areas.
- Column Speakers: Use for long narrow spaces (corridors).
- Wall Speakers: Install at ear level (~2.1 m height).
Use acoustic simulation software (like EASE or JBL DDA) for precise coverage mapping.
7. Cabling Design and Wiring Standards
Cable Type Selection
- Use shielded audio cables for mic inputs.
- Use 2-core speaker cables with adequate gauge based on length:
- Up to 30m → 1.5 mm²
- 30–100m → 2.5 mm²
- 100–200m → 4.0 mm²
Cable Routing
- Avoid parallel runs with high-voltage cables (to prevent noise).
- Label both ends of every cable clearly.
- Use PVC conduits or cable trays for protection.
- Maintain color coding:
- Red: Amplifier Output +
- Black: Speaker Return –
100V Line vs Low Impedance
For long cable runs and large zones, use a 100V Line System — it reduces signal loss and allows easy parallel connection of multiple speakers.
8. Installation Process — Step-by-Step
Site Survey & Layout Planning
- Inspect floor plans.
- Mark speaker and mic points.
- Identify amplifier locations (near power sources).
- Ensure easy cable routing between floors.
Mounting
- Fix speakers securely (ceiling cutouts or brackets).
- Mount amplifiers on racks with ventilation.
- Ensure microphones are easily accessible.
Cable Laying
- Follow drawing layout.
- Highlight completed cable runs and record dates.
- Mark IN/OUT cables near each device.
- Avoid sharp bends or cable strain.
Connection
- Connect mic → mixer/preamp → amplifier → speaker line.
- Match amplifier output to speaker line (100V or 8Ω).
- Check polarity consistency.
Power Verification
- Use a multimeter to measure voltage at PA panel.
- Do not power on if voltage is out of range.
- Verify proper earthing of amplifier rack.
Initial Power-On
- Power up the control panel without zone connections first.
- Check display and LED indicators for faults.
- Once stable, connect zone lines one by one.
Functional Testing
- Test each zone individually.
- Adjust volume and tone (bass/treble).
- Check for distortion or hum.
- Test emergency mic and alarm override.
9. Fine-Tuning & Commissioning
After installation, perform acoustic calibration:
- Adjust equalizer for clarity in voice frequencies (2–4 kHz).
- Set paging microphone priority levels.
- Record SPL readings (dB) in each zone for uniformity.
- Store volume presets in the amplifier or digital controller.
Document all test results for future maintenance.
10. Integration with Fire & Emergency Systems
Modern PA systems often integrate with fire alarm systems for evacuation announcements.
Ensure:
- The amplifier supports Emergency Override Input.
- Connection from Fire Panel relay to PA controller is tested.
- Priority paging mic has override access.
- Backup power (UPS) provides at least 30 minutes runtime during mains failure.
11. Maintenance & Periodic Inspection
To keep your PA system reliable:
| Frequency | Task |
|---|---|
| Monthly | Check all speakers for distortion and clarity |
| Quarterly | Test all zone amplifiers and mic inputs |
| Half-Yearly | Clean amplifier racks and filters |
| Annually | Measure line impedance and retighten terminal connections |
Always replace damaged cables or corroded connectors immediately.
💡 Expert Tip: Maintain a PA System Logbook noting test results, issues, and corrective actions.
12. Troubleshooting Common PA Problems
| Problem | Cause | Solution |
|---|---|---|
| No Sound | Loose cable or amp failure | Check wiring and power |
| Distorted Output | Overloaded amplifier | Reduce volume / add amplifier |
| Humming or Buzzing | Ground loop / unshielded cable | Use balanced input cable |
| Uneven Volume | Poor speaker placement | Reposition or add speakers |
| Mic Feedback | Speaker too close to mic | Adjust mic gain or move mic |
13. Safety & Compliance
- Follow IS 1881 / IEC 60268 standards for public address installations.
- Ensure all racks are earth-bonded and surge-protected.
- Use fire-retardant LSZH cables in commercial spaces.
- Label each device with zone ID and load rating.
- Keep schematics, manuals, and wiring maps onsite for service engineers.
14. Modern Advancements in PA Systems
The future of PA systems is smart and network-based:
- IP PA Systems: Digital paging and music distribution over LAN.
- PoE Speakers: Power and audio via single Ethernet cable.
- DSP-based Systems: Automatic EQ, delay, and volume control.
- Cloud Monitoring: Remote diagnostics and system alerts.
These technologies improve reliability, reduce cabling, and enable remote control.
15. Documentation & Handover Checklist
Before project completion, always provide:
- System layout drawings (with speaker & amp ratings)
- Cable routing diagrams
- Test and commissioning reports
- User manual and operation guide
- Maintenance schedule
A well-documented handover ensures smooth operation and easy future servicing.
Conclusion: Clarity, Control & Confidence
A properly designed and installed PA systems transforms communication — from classrooms to factories, clarity becomes confidence.
By following professional practices — analyzing acoustics, planning zones, balancing wattage, and verifying each connection — you build a system that lasts for years.
Sound isn’t just noise amplified. It’s your message, your safety, and your connection to everyone in the space.
🎯 Take Action:
Need expert help in designing or upgrading your PA system?
📞 Contact our certified team for a free site evaluation and quotation today!
Public Address System | CCTV Camera Installation | Biometric Attendance | Fire Alarm System | Amplifier For Speakers | WhatsApp